If you like what you see PLEASE SUBSCRIBE! Twitter - @MrStickMonkey Foam Link - bit.ly I get asked lots about this so I hope this quick video helps get the difference between the two across. Any questions, please ask! Cheers Stick Stick / Maplewood Studio www.youtube.com www.facebook.com www.soundcloud.com www.maplewoodstudio.com
Wednesday, August 31, 2011
Monday, August 29, 2011
How to Soundproof a Room : How to Soundproof a Room Cheaply
When soundproofing a room, the first step is to plug up all of the sound leaks. Soundproof a room cheaply with tips from an acoustics specialist in this free video on soundproofing. Expert: Arthur Noxon Contact: acousticsciences.com Bio: Arthur Noxon is the founder of Acoustic Sciences Corporation, who designs and build specialty acoustic products that typically are used to support high performance, high power audio playback systems. Filmmaker: max koetter
Sunday, August 28, 2011
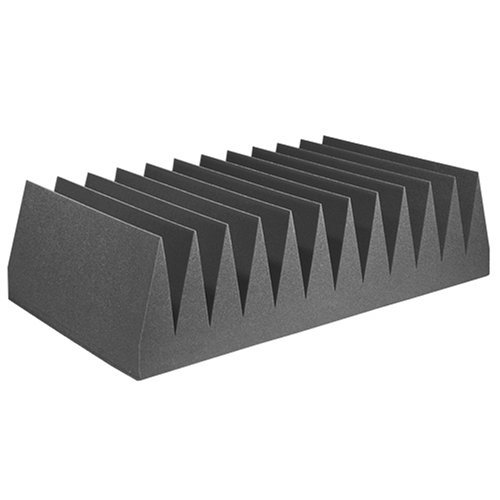
Best cheap Auralex WEDGIE-24 Wedgies- Box of 24- 1'x1'x2 Panels in Charcoal Only for $99.00 Auralex Acoustics


Cheap "Auralex WEDGIE-24 Wedgies- Box of 24- 1'x1'x2 Panels in Charcoal Only" Discount review update price today
Saturday, August 27, 2011
Energy-Saving Foam Insulation No Longer Reserved for New Homes and Can Cut Utility Bills in Half
With this past summer's heat in the low three digits, many of us are sweating electric bills in the high three digits. As homeowners search for ways to rein in energy costs, new technologies and financial incentives are as welcome as a cool breeze.
Heating and cooling account for 50 percent to 70 percent of the energy used in the average American home, and adding wall insulation is one of the most effective weatherization steps homeowners can take. If your home is as little as five to 10 years old you likely have one of America's 46 million under-insulated homes, according to the Harvard University School of Public Health.
Insulating existing homes is no longer the major construction project it once was when it involved tearing into walls to insert fiber batting and spray-on foam, or cutting large holes to blow in loose-fill insulation.
Eco-friendly formulations of foam insulation can now be injected into wall spaces entirely from the home's exterior and is one of the most effective forms of weatherization. A government tax rebate makes adding insulation an even more attractive choice to slow the electric meter.
New choices in foam insulation allow injection through the outside wall via small holes drilled in the mortar spaces between the brick or other exterior siding. This process involves drilling a row of three or four small ¾" holes within each stud cavity.
The injection process begins at the bottom hole. Air is allowed to escape through the upper holes as the foam gradually replaces the air in the wall. This foam insulation has the consistency of shaving cream when it first leaves the injection nozzle. The creamy consistency allows the foam to flow into the wall and work its way around any existing insulation. As the wall fills, the injection nozzle is moved from the lower holes to the upper holes until it is finally capped off at the top plate. This process continues around the house perimeter until the walls are all filled.
Within one minute of injection, the foam solidifies and then cures fully within a day. After all walls are filled, the crew mixes mortar and fills the injection holes with matching mortar or inserts wooden plugs leaving little evidence of the insulation process.
And while foam insulation usually costs more than traditional batt insulation, foam forms an air barrier. This can help eliminate other costs and tasks associated with weatherizing a home, such as caulking, applying housewrap and vapor barrier, and taping joints.
Foam insulation has usually been reserved for new homes because there wasn't a cost-effective way to get the foam into the wall cavities of existing homes. Contractors tried their best, drilling holes in drywall near the ceiling and ladling "pourable" versions of these expanding foams into the airspace within the wall. This method worked, but it was slow, messy and required costly repairs to patch holes and cracks in the drywall. While some homeowners could afford to upgrade to foam insulation, the additional costs for drywall repairs and repainting pushed it outside the range for many others.
There are several foam insulation products on the market today. Some, such as polyurethane and urea formaldehyde foams, have drawbacks such as containing toxic chemicals, shrinking as the foam ages and deterioration of insulating value. Other products have been withdrawn from the market, and some are just now becoming generally known by both construction professionals and homeowners.
Some non-toxic, highly effective injectable foam insulation products are entering the market, although they aren't as well-known as the older, traditional types of insulation. And in the case of one such product, RetroFoam, confusion about its content resulted in it being banned in Canada despite the manufacturer's protests. There's even a soy-based foam on the market in some parts of the United States.
A proprietary hybrid injectable foam insulation product marketed as Tripolymer® or HomesulateTM, is making inroads across the country as installers establish their business territories. Created in 1966 by the C.P. Chemical Co. of New York, this material was originally designed for use as a fire-resistant thermal and acoustical insulation in commercial and residential structures.
In 1975, the company expanded and refined its material with the help of the U.S. Department of Energy, which chose it as one of three products out of 7,000 candidates to assist in further development. After three years of intense research and testing, Tripolymer 105 greatly surpassed all expectations.
It is now available to retrofit homes and involves an economical process that enables crews to inject non-expanding foam insulation into wall cavities that will bond with whatever existing insulation may be in the wall.
Some customers have saved up to 50 percent on their energy bills and the process qualifies (at least through the end of 2010) for up to $1,500 in federal tax credits. Many electric utilities offer additional cash rebates for weatherization projects such as adding insulation. Cost recovery from energy savings, rebates and tax credits can be a matter of a few years or less.
In addition to energy savings, many wall foam insulation products offer increased fire resistance and noise reduction from outside sources.
Insulation products are rated in terms of thermal resistance, called R-value, which indicates the resistance to heat flow. The higher the R-value, the greater the insulating effectiveness.
The new breed of foam insulation products provide impressive R-values. They vary somewhat, but the Homesulate formulation has the highest R-value of any retrofit insulation at 5.1 Rs per inch. That's a full 45 percent greater than blown-in fiberglass and 30 percent above the best blown-in cellulose. C.P. Chemical's product delivers R-values of between R-17.8 and R-28 depending on a home's construction.
Ask anyone living in a home with spray foam insulation in their walls. Their energy bills are lower than their neighbors with standard insulation; the home is more comfortable, with consistent temperatures from room to room; and they don't notice the barking dog next door.
Carolee Kamesch is president of Prestige Designer Homes ( http://www.PrestigeDesignerHomes.com ), a custom home-builder in Dallas, and owner of Homesulate of North Texas ( http://www.FoamMyWalls.com ), a foam insulation installation company. Among other certifications, she is a Certified Green Professional (CGP) and serves on the board of directors for Green Built Texas.
Thursday, August 25, 2011
Cheap Value Line Foam, light gray
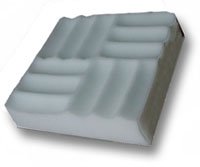
Cheap "Value Line Foam, light gray" Discount review update price today
Wednesday, August 24, 2011
Isolite Foam Concrete poured on roofs Eng Vers.wmv
This clip shows Isolite Foam Concrete production procedure. (Isolite foaming agent is produced in Lebanon and marketed all over the world since 1964 by www.barakeh.com ). Starting from cement and water filling, adding foam through the Isofoamer Infinity continuous foam generator, mixing the slurry with foam into the mixer of the Isofoamer Compact, pumping the foam concrete up to 120 meters vertically to the substrate, pouring this surface, leveling... This Isolite bed used as cavities filling, thermal and acoustic insulator may be covered in different ways; - Concrete screed. - Tiles. - Bituminous membrane. - EPDM membrane. - PVC membrane. - PU membrane. - Acrylic flexible coating. - Lynolium membrane. - Vinyl membrane. Isolite foam concrete may be used as well for partitions, blocks, building low cost and lightweight houses. For more info please mail to info@barakeh.com Always a pleasure satisfying customers needs.
Monday, August 22, 2011
Check Out CRL 1/4" x 1/2" Norseal V730 Acoustical Sealant Tape
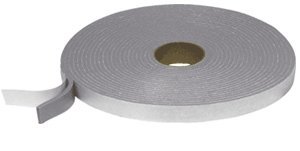
Cheap "CRL 1/4" x 1/2" Norseal V730 Acoustical Sealant Tape" Discount review update price today
Saturday, August 20, 2011
Dynamic Sirens
Dynamic Sirens A siren is an acoustic transmitter that operates based on bridging a flow of gas or liquid. Depending on their operation principle, there exist dynamic (rotating) and pulsating sirens. In the latter the flow is bridged with the help of a flap that performs alternate motion using a magnetic or an electrodynamic transducer. Dynamic sirens are used more commonly. There exist radial and axial dynamic sirens. In the former the flow moves along the radius perpendicularly to the axis, and in the latter - the flow movement corresponds to the rotation axis. In axial sirens a disk with holes (rotor) rotates with respect to the immovable disc (stator). In radial sirens the rotor and the stator are two coaxial surfaces (usually cylindrical). The rotor is rotated by an electric motor or turbine. The air entering the holes of the rotor and stator periodically stops, which creates compression and exhaustion in the outside environment. The sound frequency depends on the frequency of holes in the rotor and stator and the frequency of rotor's rotation. The frequency range often applied in practice is 200 Hz-100 kHz, however there are also sirens operating with the frequency of up to 600 kHz. Siren capacities can reach tens of kWts. Dynamic air sirens are used as alarms and for process purposes (coagulation of fine aerosol, elimination of foam, fog suppression, acceleration of mass exchange and heat exchange processes, etc.).
Thursday, August 18, 2011
Tips and Tricks for a Fantastic Finished Basement
Ever wonder when would be a good time to finish the basement? The answer is now! Finishing the basement significantly boosts your home's value, and it's the easiest and cheapest way to add cozy, versatile living space to your home. The best place to start is from the bottom-and then up-so begin with your floor. Before you do anything else, determine if it's level. Basement flooring often will be slope slightly to enhance drainage; remember to look for a floor drain and keep the general slope. After you understand how the floor will drain, find the point of maximum elevation. This will be the starting point for the new floor. By placing the electrical or water lines at the top or bottom of the wall, you'll get them out of your way. Make sure that there will be enough electrical outlets for your needs. Since there is little natural light, your finished basement will need adequate artificial lighting.
To begin the walls, attach furring strips to your masonry. These strips are either 1x2 or 1x3 wooden strips that will hold up the panels in your new basement. Begin the process by installing the furring strips along the top and bottom of the room. Then place them in the corners. The strips that go vertically on the walls should be placed every 16 inches. You can use these to even out the walls. Caulk masonry or construction tape can be used to keep the strips secure. After the furring strips are where they should be; now you must deal with the insulation. Next you'll take the foam insulation and cut it down to fit between the strips you have placed. Once things are in place, use the attached facings to staple the boards to the vertical strips. Another method is to simply glue the boards in place. Cover the insulation with plastic sheeting to protect your room from moisture.
Last you'll affix your wall panels to the furring strips. It's best to begin in one of the four corners. Just be sure to allow for one quarter inch clearance between the panel and the floor. If you're using standardized paneling, they should be about foot feet wide. Therefore, the panels should be positioned in the middle of the furring strips. The next step is to apply adhesive to the furring strips and glue the panels into place. Remember though-- the glue will only remain sticky for about ten minutes, so only do a few at a time. Make sure that the top of your panel is attached firmly to the furring strip. Do this by driving a nail or two into the panel and strip. Be careful not to nail the bottom right away. Instead, place a small wood wedge underneath the panel so that the adhesive can activate for a few moments. Once the glue has had time to work, gently tap the panels into place, after removing the wedges. Then it's just a matter of securing them with a nail or two. Of course, before you even try to attach the panels, you need to make sure you make an account for access holes in them. You'll need to cut the window shapes out before the panels are attached. With a little forethought, you can cut one half of the window out of one panel, and the other part out of another. It's much easier to do this then trying to cut a whole window out of one panel. Every room -- especially your basement-- must have at least two methods of egress from it. One of the windows can serve this purpose as long as it's large enough and not too high from the floor-usually no higher than 54 inches. The exact measurements required will be found at your town's zoning commission or building department. Be sure to check with them. If your plans call for larger windows, you might seriously consider calling in a professional building company to handle that portion of the project. Remember to mark on the paneling where the electrical outlets will be in the room. Then it's just an easy matter of cutting the access holes once everything is in place. Later you can drill a hole at the top right corner of the outlet and then use a fine tooth saw to cut around the outlet.
For your ceiling, install soffit or trays along the perimeter of the room. Acoustical tile works best in typically low basements. Detract from the lack of height by emphasizing the length and width of the room, and hang pictures lower than you normally would.
Looking for your dream home in Colorado, but can't decide if you want to buy real estate in Lakewood CO or purchase Greeley CO real estate? You may consider letting a real estate agent help you in your search. They can provide valuable information about the Greeley areas you are looking in, including complete real estate data for any homes or properties you may find.
Wednesday, August 17, 2011
What Is The Open Wall Construction Technology?
Open Wall construction is not limited to a single technique. The theories and principles behind the construction are unique, but the design uses existing methods and materials to allow for complete flexibility.
Methods discussed later describe only one of a number of design models created, and provides examples of the applications, which should be modified to meet local codes and personal preferences.
Wrap and Strap Open Wall Construction
This method is ideal for tradesmen because its application is simple, and the buildings thermal envelope can easily be maintained. It consists of a primary shell, which is the buildings structural skeleton, being constructed with standard platform framing techniques. The entire building is then wrapped in polyethylene, then a second non-structural skin is attached to the exterior, which is insulated and finished. This type of open wall construction is used to retro-fit existing two by four construction into super-insulated, air tight homes.
Platform Open Wall Construction
Platform construction methods require that the framing carpenters perform not only the structural framing, but install the windows, doors, insulation, air/vapor barrier, exterior moisture barrier and sometimes exterior finishes when used in paneled wall sections.
This method has been utilized in the pre-manufacture of exterior walls in sections which are handled by four workers easily. It is very effective for consumers, not familiar with structural design, but who wish to erect their own homes. It is also a much quicker method because the building can be factory built elsewhere, shipped, and erected with the vapor barrier, insulation, electrical, interior finishes, windows, doors and siding already installed. A unique ability of this method is the capability of the structure to be disconnected and moved in sections. This would have ideal applications for modification and additions, or to perform panel repair/replacement.
Construction of pre-manufactured walls are made in major sections of eight foot lengths, and minor sections, in divisions of one, two or four feet. Corner units are constructed to allow for varying exterior wall thickness. Wall heights include above floor thickness to maintain interior ceiling heights of seven foot six inches to nine feet.
Foundation
When building the foundation wall assemblies, it is important to use proper materials and consider the use of a raised, compacted sub-footing. Whether using a granular sub footing, a full height concrete footing or a footing and sub foundation to elevate the wall assembly, the foundation panels cannot be backfilled more that three and a half feet. Any more than this and the structural integrity of the wall will be compromised.
Foundation walls must also be constructed with at least two by eight inch plates to prevent lateral plate failure caused by earth pressures. The bottom plate is of pressure treated material which is about one quarter of an inch smaller than non treated construction lumber. Because of this, the interior structural two by three wall assembly must overhang the plate by approximately one quarter of an inch. Exterior wall framing can be made with economy or number three graded lumber so long as it is pressure treated to resist rot. The horizontal economy grade stabilizer and remaining stud grade plates are non-treated lumber.
The interior framed two by three wall is constructed first. It is constructed with regular framing nails with the studding at sixteen inch centers. The wall section is then squared off and secured to prevent movement. Over this, a polyethylene air/vapor barrier is placed, with the edges folded over the outer wall members, and stapled along the outside faces. Do not staple the air/vapor barrier to the edges of the plates or the studs, this will only punch irreparable holes in it. Corner sections require that the air/vapor retarder be wrapped around the interior walls corner studding. At this connection it is necessary to ensure that enough of the air/vapor barrier is left so that it will provide a surface to seal to at the interconnecting sections. Corners should be neatly folded to prevent bunching which would create air passages and prevent proper joining of the sections.
Over this, a horizontal stabilizer is laid down perpendicular to the wall studding, and fastened with screws to each individual stud. The stabilizer should be placed forty-five inches above the sole plate for full batt insulation placement. The composite wall top plate can then be fastened to the interior wall top plate, flush and true, with normal ardox framing nails.
Individual pressure treated exterior wall studs can then be nailed to the to top plate at sixteen inches on center. The pressure treated sill plate is fastened, first to the exterior studding, then the sole plate of the interior wall assembly, the two end studs, then all exterior wall studs. These studs should be lined up straight, and fastened to the horizontal stabilizer with wood screws. Structural wind bracing (when required) is placed in the wall section, by being let into the exterior wall studs.
Batt insulation is laid in the middle cavity, perpendicular to the studs with approximately one half-inch overhang at the ends of the wall assembly. Batt insulation can now be placed within the exterior stud cavities. Depending on the covering of exterior, foam insulation and or sealed polyethylene to grade is applied. If foam insulation is used, the joints are sealed with vapor tape or acoustical sealant to the wood wall components as well as each other. It is a good idea to install the walls vapor trap along with the exterior polyethylene, as a single sheet, which can be sealed to the interior vapor barrier between the two sole plates. A moisture barrier is then placed over the wall assembly. It is secured by folding the edges over the studs and plates, and fastening with staples.
Finishing the wall by installation of the pressure treated plywood foundation cover and/or siding is then done. The plywood foundation paneling must be installed with the joints staggered against the underlying foam board. These panels are fastened with exterior screws, spaced eight inches around the edges, and ten inches within the interior area.
Foundation vapor traps and groundsheets should be sealed by sandwiching them between the sill plate and the top of the foundation with a combination of sill gaskets and acoustical sealant. The moisture barriers are sealed with vapor tape at each joint. Anchor bolts should be left loose to allow for shimming or grouting if necessary.
The exterior walls are fastened together with wood screws, every two feet along the end studs of the interior wall. If required, metal tie straps are installed on the inside edge of the top plate. The walls can then be leveled and squared before proceeding with floor or roof construction.
First Floor Walls
In design, it is important that if you do not use tie straps to hold the sections together, then the upper and lower sections should have overlapping plates to prevent separation. Also, depending on the particular design, the floor may have to be installed before continuing. It is recommended to install floors before continuing for this gives the carpenters a level area to construct the upper walls on and supports the exterior foundation.
One way these walls can be installed with the windows and siding is by overhanging the wall sections. Construction of the interior bearing walls, vapor barrier, stabilizer, plates and exterior wall studding in this approach is similar to the foundation wall assembly. Where they differ is in the edging of the units.
Edging is the bottom cover, which hides and protects the overhanging framed members and insulative barrier. It can be decorative hardboard nailed to the underside of the sole plate which is sandwiched between the plate and the foundation or floor assemblies. This edging should be sealed to both the first floor and foundation wall or to the floor assembly vapor barriers.
This overhang method is ideal when combined with a face brick applied around the first floors exterior. The overhang allows for installation of bearing, platform framed floor assemblies while providing sufficient second story overhang for the brick face.
Windows and Doors (exterior openings)
Probably the trickiest area to seal against infiltration and exfiltration. Although the area around the opening could be sealed with expanding foam, by pre-installing the windows in frames with a perimeter gasket, less work and material is required.
The window or door is first squared off in its frame, and held in place by cross corner strapping. A half-inch plywood or aspenite frame is built up around the window. The aspenite frame width should be equal to the entire thickness of the wall assembly. This frame is then sealed to the window by sandwiching a sill gasket between it and the surrounding wood members, which is secured with wood screws inserted through the window frame. This allows removal for future repair or replacement of a window or door. Leave approximately two inches of the gasket extending beyond the interior edge. The resulting box allows fastening of the interior finish directly to its surface, without gaps or unsupported areas.
The framed walls and header should be attached with screws directly to the boxed window, with sealant applied between the box and the individual vapor barriers. After squaring up the completed section, bracing is let into the studs. This bracing is important to the operation of windows or doors, because out of square or twisted framing will cause binding. For this reason, casement windows and wood doors should be used to allow post construction adjustment. Once the bracing has been secured, exterior sheathing with the moisture barriers are installed together, and exterior finishes applied.
Interior Floors
Because open wall construction relies on continuous wall insulation between stories, the interior floors in this method must be designed to remain within the building envelope. Utilizing overhanging walls, wider lower wall sections or ledger strips, the interior floors can be supported on sufficient bearing. Floor assemblies can be joists, truss floors, wood I beams or any other type of framing material.
Floor construction, through wall overhang or wider lower wall sections, allows the carpenters to construct the floor assemblies as current accepted practices, with one exception. The header or trimmer joist may have to be placed inside the edge of the top plate of the lower wall. The main concern with this type of construction is that when installation of the upper-framed wall is attempted, there is a likely hood of dropping the lower wall off the platform and foundation wall when raising it. Simple blocking or tiebacks under the floor will prevent such a problem and ensure site safety.
Floor construction with ledger strips or ribbon boards permit finished floor levels to meet with the top plate of the lower wall assembly. The bearing ledgers or ribbon boards should be installed as per local building code requirements. Floor sheathing must overlap the wall joists to ensure a proper firebreak between floor levels. Although time consuming, header and trimmer joists can be omitted because end restraint is achieved by lamination to the lower wall studs.
Variations of the interior floor support concepts can include second plates, joist hangers or tie straps. Most importantly, design the connections for your tradesmen abilities. Framed floors are easiest to construct and install because the techniques and design criteria already exist. Only qualified personnel with the proper experience should attempt other more complex designs.
Roofs
Open wall construction was designed for use with truss components, but by strapping over ceiling joists, the same results can be obtained. For effective design, overhangs should be completely eliminated. They are costly and require extensive labor to complete. Roof edges should have angled fascia (called knife edging) to allow enough overhang to prevent excess run off from running down walls. Simple "two by" fascia, lapped over wall siding can be trimmed or painted in many colors and still provide adequate visual separation from the roof. By lapping the fascia over the siding gravity water cannot enter into the buildings wall cavities. But remember to leave enough screened eave area, to allow for adequate attic ventilation. Gables should also be completed with knife edging and reduced overhang. Sheathing and roofing materials are applied as per current building techniques.
Raised heel trusses or plated ceiling joists will raise the roof to allow for eave insulation and venting. The attic vapor barrier should consist of 10-millimeter polyethylene. This thicker and more durable layer is less likely to be damaged during construction, or when running fish tapes for future utility lines. The vapor barrier is installed parallel to the truss members or ceiling joists. Wall edges are sandwiched with acoustical sealant between the top wall plate and two by two strapping. Joints landing on truss members or ceiling joists should be sealed between it and a piece of two by two strapping.
Over the ceiling air/vapor barrier, two by two strapping is screw nailed to the underside of the ceiling support members. Areas around penetrating utilities such as stack vents and furnace exhausts should be made with plywood sealed directly to the air/vapor barrier. Holes drilled or cut for the utilities must be carefully sealed to the plywood with expanding foam or other acceptable materials such as acoustical sealant.
Julian Arhire is a Manager with DtiCorp.com - DtiCorp.com carries more than 35,000 HVAC products, including industrial, commercial and residential parts and equipment from Honeywell, Johnson Controls, Robertshaw, Jandy, Grundfos, Armstrong and more.
Tuesday, August 16, 2011
Soundproofing Today
The word soundproofing in reality is a misnomer. Basically in an application where soundproofing is needed you are actually looking to reduce the sound to the most tolerable level possible. There are so many conflicting websites and information on the Internet that address soundproofing and most are quite confusing even to the professional builders and developers out there, let alone a novas homeowner. Where can you go to get straight answers and not just some salesman trying to make a sale?
There are a lot of reputable soundproofing companies out there and with a little research you will be able to weed out the bad ones from the good ones. Soundproofing is not Rocket Science, but it does involve a degree of common sense thinking.
When looking to solve a soundproofing issue, know exactly what you want to accomplish and be as specific as possible when talking with a soundproofing technician. For example, if your issue is that your son's drums are bothering the neighbors, then it is clear that you need a sound barrier or a sound blocking material. Here's where the confusion comes in. Is it only a barrier or a blocking agent that will work in this application? Absolutely not! There are sound damping compounds that will also stop the sound from leaving your home and migrating over to your neighbor's house. These sound dampers are generally in a paste or caulk type material that would be applied to the back of a layer of drywall and then that new drywall applied over top of the existing drywall to create a sound damped wall assembly. The way a sound damper works is that it damps 2 layers of drywall. In other words it removes the drywall's ability to vibrate or resonate with the sound. If the drywall is unable to resonate then it will be unable to transmit the sound through the treated walls or ceiling in the drum room. Sound damping is a relatively new technology, but has proven in many cases to be more effective than the barrier products out there today. One extremely effective sound-damping compound is called Green Glue(TM) Green Glue is fast becoming the most effective and easy to install soundproofing agent on the planet. The Green Glue Company is now a worldwide corporation distributing their product throughout the world.
Once again as you're looking for soundproofing materials, be specific as to what you need and what result you are looking for. Also know the difference between "Soundproofing" and "Sound Conditioning". Sound conditioning is treating a room to reduce the amount echo or reflective noise, or to deaden the room's acoustical properties. As a rule most sound conditioning products will do nothing to block sound from getting out of a room, they are simply noise absorbing materials and help to quell the echo or reverberation in any given space.
If you're one of those people who feel that they have no clue about soundproofing then in my opinion you will be one the easiest people to deal with. You'll have an open mind and will be able to rationally make a decision based on the knowledge of a soundproofing expert.
In today's rushed and hurried world, it is often difficult to devote the time needed to research soundproofing to the degree needed to fully understand the concepts and techniques needed for effective results. Sometimes it is necessary to trust an expert in the field and then proceed with your soundproofing project armed with that knowledge.
I get phone calls every day from people who have sound control issues, but have no clue as to how to deal with them. I am usually able to reassure them and offer solutions that are realistic and effective.
In conclusion, it is always best to do your research. It's sad, but there is so much conflicting information out there regarding soundproofing that it sometimes boggles the mind. One of the best ways to find good information regarding your soundproofing project is to look online for articles that relate directly to your individual soundproofing issues. For example, if you need to soundproof a fence, type into the search block "articles on Soundproofing a fence". You'll be amazed at the information you will find on that one particular subject.
A soundproofing expert who takes the time to write quality articles on a subject is generally a respected expert in the field, not always, but as a rule they are. Read the article and then go to the Authors Bio and contact him with any questions or concerns you may have. These authors are not usually trying to sell you anything other than an idea or a method for soundproofing. I hope this has been enlightening for you. This is Dr. Bob...Out!
Dr. Bob is the Senior Technical Advisor at Soundproofing America Inc, the leading authority in Soundproofing and Acoustical treatment technology.
Dr. Bob O.
Soundproofing America, Inc.
Senior Technical Director
Soundproofing Expert to The New York Times, The San Francisco Herald Examiner, The San Diego Union Tribune, and the Charlotte Observer
Ph (877) 530-0139 Toll free Fax (347) 721-9079
E-mail: Dr.bob@soundproofingamerica.com
http://www.soundproofingamerica.com
Sunday, August 14, 2011
Why Sound Insulation Is So Important
Homes and buildings are typically constructed to not only be sturdy and safe but also to keep out noises that may come in from the outside and noises that travel within the home or building as well. Sometimes though these buildings are not properly built for sound control. This can be due to a number of factors including the rate at which the building was constructed, the materials used or the pure cutting of corners by the builders, etc. Whatever the reason, many homes or buildings wind up with little or no protection from noise. Sound control is very important in a home and therefore it is not just for peace of mind but also for the quality of noise reduction.
The measurement for sound is tracked by decibels. If a noise is raised by ten decibels it means that it has risen to a level which is 10 times stronger than normal. To the average person this means it has simply doubled in loudness.
In fact, many causes for loss of hearing are due to prolonged exposure to sounds that are higher than eighty five decibels. When loud music is listened to in an area which has no sound control or hard surfaces such as a room with all hard wood floors, the sound will appear to be much louder because the vibrations will be more intense. When carpets and other spongy materials are added to the room, the sound will seem less intense within the room because it will absorb the sound within the material. It will not though, help to keep the sound from going through to other areas so it does nothing in the form of sound control within other areas of the home. In order to protect other areas and implement a sound control system, there needs to be a number of factors including thick materials to be used within the wall structures.
To keep sound from coming into the home from outside, additional sound control measures need to be taken. Decoupling is one way that this can be done. This is where the sound is broken up before it has a chance to reach inside the home. This is done by creating a double frame in the wall or adding fibreglass in the middle. Additionally if the house is properly sealed this will also help to eliminate the sound volume. Using the decoupling method though is fairly efficient. If this is not feasible, then using a more absorbent material inside the wall is also effective. Sometimes it is a good idea to further add to the drywall to increase the sound control.
It is vital to the occupants' quality of life and peace of mind to have a sound control system in place in the home or office. This is the only way to stop the sound from traveling within the home as well as coming in from outside the home. A good system in place ensures that hearing will be protected and furthermore the home will be more private and relaxed providing a better living experience.
Sue Mitchell is Leading Writer on SEO Company, having a large number of articles published on various well reputed internet sites. Check out for Her articles about Sound Insulation
Saturday, August 13, 2011
Phish - Fluffhead (cover)
PLEASE PLEASE SUBSCRIBE TO MY PAGE !!! My Favorite Phish Song I actaully made the 60 hour round trip drive from CO to Hampton and I was lucky enough to have been there Friday night when they opened with it. Words can't really describe what that was like. People were either going crazy or just standing there crying. Just incredible. Anyways I'de like to think this vid had something to do with that but I'm pretty positive it most certainly did not. Now I am just a huge Phant who got to hear his favorite song played in the most epic setting ever. Great to see the boys back in action. Thanks for the comments
Thursday, August 11, 2011
Basotect in automotive applications
Basotect - open cell melamine foam in Automotive Application. www.basotect.com The movie shows the different areas of application of Basotect® in automotive. Basotect is a flexible, open-cell foam made from melamine resin, a thermoset plastic. Its characteristic feature is its intricate three-dimensional network structure consisting of slender and thus easily shapable filaments. Basotect is flame-resistant, can be used at up to 240°C, is abrasive and has consistent physical properties over a wide temperature range. In addition, Basotect is very lightweight, is able to insulate heat, has a high acoustical absorption capacity and remains flexible even at low temperatures. These properties mean that Basotect can be used in many different applications for improving room acoustics, for the thermal insulation of solar installations, in upholstered furniture and mattresses, as well as in automobile manufacture and aircraft construction. www.basotect.com Der Film zeigt die verschiedenen Anwendungsbereiche von Basotect® im Automobil. Basotect ist ein flexibler, offenzelliger Schaumstoff aus Melaminharz, einem duroplastischen Kunststoff. Dessen typisches Kennzeichen ist die filigrane räumliche Netzstruktur, die aus schlanken und damit leicht verformbaren Stegen gebildet wird. Basotect ist schwer entflammbar, anwendbar bis 240°C, ist abrasiv und hat in einem weiten Temperaturbereich gleichbleibende physikalische Eigenschaften. Basotect ist darüber hinaus sehr leicht, kann Wärme gut ...
Wednesday, August 10, 2011
VocalBox - World's Best Studio Vocal Reflection Filter Booth
BUY NOW: www.ezvid.com Designed by Colin Roberts and Alexander Perls Materials: steel, fiberglass, poly foam, plexiglass Free delivery and installation in Southern California Please contact us for a custom delivery quote for your location Notes from Alexander Perls regarding the VocalBox: How does a producer record vocals in a modern music studio? Vocals are usually close-miked, so a tiny bit of background noise isn't a problem — the primary problem is to properly deaden the sound. A "room" style vocal booth is overkill, and ventilation is always a problem, so you have to install a fan, and then the fan makes noise. And it takes up half your studio. The other option is a cheap thing from China like the reflexion filter. Anyone who has actually used one knows that it doesn't do much for reflection deadening — it doesn't deal at all with sound that goes to the floor or goes to the ceiling. And adjusting it so you are "close enough" to the filter never works quite right. And there's no window, so if you are the singer, it's impossible to see your computer screen, or if you're working with another vocalist, they can't see you while they sing. So we decided to create a no-compromise luxury solution, aimed at the established music producer, voiceover artist, or serious hobbyist. The VocalBox doubles as a microphone stand. It has a plexiglass window, in case you want your vocalist to be able to see you. Or for maximum deadening, simple cover the plexiglass with the included ...
Tuesday, August 9, 2011
Building and Soundproofing a Home Recording Studio
"How do I soundproof my garage, basement, or a bedroom in my single family house or condo so my 4 piece rock band can practice and record and not bother the neighbors?"
If I had a dollar for every time I was asked this question, I would be in the Bahamas right now, instead of writing this article. Many factors need to be considered prior to beginning your studio or practice room-soundproofing project. Some of the questions you should be asking yourself are: What type of amplification will the band be using, are the drums going to be acoustic and miked or are they digital. Are you going to be recording live late at night or are we going to be doing "line in" recording only? These questions and many more need to be considered before the actual construction begins. If live recording and rehearsal are the plan, then maximum soundproofing will be needed. The most effective way to soundproof a garage, basement, or bedroom is to actually construct a room within a room (go to http://www.auralex.com) and download the free booklet "Acoustics 101", this is a wonderful resource for the home studio builder.
Their ideas are solid and applicable to any studio-soundproofing project. The room within a room concept utilizes the sealed dead air space that is captured between the inner walls and the outer walls to help greatly with the soundproofing endeavor. It is probably easiest to frame the walls on the floor and then tilt them up into place thus making dry walling the outside of the walls much easier. It is also highly recommended that another ceiling be joisted out for the room within a room, however, this is often times not possible due to space constraints.
In this case, the existing ceiling and ceiling joists may be used as the ultimate ceiling for the studio, provided that it is adequately soundproofed with materials such as the mass loaded vinyl or a combination of closed cell foam mat and MLV. I will elaborate on these materials, as we get further into this article. Once the walls are framed out and the right amount of "Dead air space" is determined, then it is time to install the soundproofing. The first order of business is to consider what needs to be done to the wall cavities prior to installing a barrier and finally the wallboard. I like to line the inside cavities with a closed cell vinyl nitrile foam mat such as American Mat. This mat (generally 1/4" thickness) is adhered to the inside cavity walls as well as the studs and joists using a contact cement to adhere the mat. Keep in mind that the American Mat is used to line the cavities only, not to fill the cavity. If thermal insulation is needed, use products such as rock wool, mineral wool, cut wool fibers, or my favorite, Roxul. Roxul is a great thermal rock wool based batt type insulation that has great soundproofing qualities. If thermal insulation is a requirement for the practice room or studio, then Roxul is the way to go.
Now we come to a crossroads, it is time to determine if decoupling the walls using resilient channels or American Sound clips is a necessity. De coupling is used when impact transmission or low frequency noise is a factor. Impact would come primarily from the drums (acoustic type) or the bass amplifier. However, if the band is using Marshall high powered amps (50 watt amps with 4 X 12 cabinets for example) along with miked acoustic drums and an Ampeg bass system, then decoupling will most likely be necessary. These methods and procedures will be explained in later articles. If decoupling were determined to be unnecessary, then the next step would be to find a good barrier material such as American mass loaded vinyl (which is a high grade mass loaded vinyl barrier). This barrier could be stapled directly to the studwork on a wall assembly or directly to the joists. This is a method that is used if cost or space constraints are factors. If the barrier material is to be stapled directly to the stud or joist framing then it is best that the seams be over lapped, caulked (using OSI acoustical caulking compound) and then taped with either a lead tape or a heavy-duty PVC seam tape.
Once the Mass Loaded vinyl (MLV) is installed and sealed, it is time to install the final layer of drywall. I always recommend using 5/8" drywall as the final layer because of its mass and its sound blocking abilities. . It is always advisable to butter the edges of the last layer of drywall with acoustical caulk. You want to grab every STC (sound transmission class) point you can when trying to make your new studio as soundproof as possible. Finally you will tape mud and paint your final layer of drywall. Now you have a great soundproof home recording studio. We will discuss acoustical treatments for your studio in subsequent articles, but for now you are well on your way to having a professional grade-recording studio in your home.
Dr. Bob O.
Soundproofing America, Inc.
Senior Technical Director
Soundproofing Expert to The New York Times, The San Francisco Herald Examiner, The San Diego Union Tribune, and the Charlotte Observer
Ph (877) 530-0139 Toll free Fax (347) 721-9079
E-mail: Dr.bob@soundproofingamerica.com
Website: http://www.soundproofingamerica.com
Monday, August 8, 2011
BFM Tuba HT (THT) Subwoofer - Music 1/2 meter from mouth
Trying to do a little max spl stuff with the Tuba... but I can't get anywhere close without knocking stuff off of shelves haha This was Damian Marley - Road to zion half a meter in front of the tuba... maxed out the meter at 126db. It's a large room with 9ft or so ceilings, wood floors, not a lot of furniture. At the listening position it was a comfortable ~115db. I could still turn it up quite a bit but I knocked a picture off the wall... my bad. Oh and the SPL meter is tetering ever close to the edge of that acoustic foam!
Sunday, August 7, 2011
Cheap Auralex 12VEN24CHA Venus Bass Traps in Charcoal; 2- 2'x4'x12 Panels for $349.00 Auralex Acoustics
Cheap "Auralex 12VEN24CHA Venus Bass Traps in Charcoal; 2- 2'x4'x12 Panels" Discount review update price today
Friday, August 5, 2011
How to Choose Laminate Flooring Underlayment
When you install a new laminate floor you will need to also install an underlayment. Knowing how to choose the right laminate flooring underlayment is as important as choosing the right laminate floor. The underlayment protects and cushions the flooring.
The first thing you will need to know is if there are any problems with the sub floor. One of the most common problems with sub flooring is dampness. In climates that are high in humidity, this is a common problem.
You can get a flooring underlayment that will protect your laminate floor from this moisture. You want to make sure that the underlayment is completely installed before you begin to put down the laminate floor. This is one area where you do not want to skimp. You should have enough underlayment to extend beyond the flooring for complete coverage.
Some may choose the underlayment according to the noise level of the laminate that they have chosen. Some laminates can be quite loud when they are walked on. This means that you will need to get an acoustical blocking flooring underlayment.
This is a bit thicker than the stand underlayment to help muffle the sound of the floor. The noise blocking underlayment is also a good choice when you have children as it will help to keep the noise in your home and not in the neighborhood. Many times children can be quite loud and your neighbors will appreciate your thoughtfulness, especially if they do not have children themselves.
After you have decided what you are looking for in laminate flooring underlayment, you can get started on creating your new floor. It is not difficult to do and the end result will surely more than make up for all of the preparation that took place before hand.
Click Here for Discount Laminate Flooring Underlayment.
Thursday, August 4, 2011
Braun Ambulance Features and Benefits
At Penn Care we offer more features and better quality, we believe in building value for our products. Here is a product presentation to walk you through the features of the Braun Ambulance, better known as the Rolls Royce of ambulance. We believe in innovation and have designed the Braun keeping ingenious features in mind. Some of the features exclusive to Braun are: use of 3-D modeling s/w Solid Works, Master tech (peer to peer) multiplex electrical system, easy glide side entry doors, and free floating handles. We offer solid body construction which uses the same material throughout the truck. This minimizes the possibility of corrosion and creates a lighter truck. A lighter truck also means less wear and tear for tires and fuel economy. We have an in-house staff to custom design the graphics for the ambulance on site. We use a spray & insulation foam which provides thermal and acoustic insulation. Our paint manufacturer allows a 7-year warranty. We use Trim-pro interiors that are moisture proof and intelligently placed vitalmax lighting for convenience. Braun also has seal tight doors with thicker skins to avoid wear & tear. Call us today at 800-392-7233 or visit our website at www.penncare.net
Tuesday, August 2, 2011
Check Out 25 sq Ft Increments - Premium 1/4" Acoustic Foam 5' x 5' or Longer SoundProofing/Sound Deadening Acoustical Foam Sheet Barrier - Made in the USA!
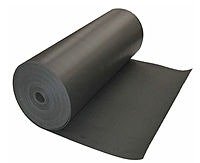
Cheap "25 sq Ft Increments - Premium 1/4" Acoustic Foam 5' x 5' or Longer SoundProofing/Sound Deadening Acoustical Foam Sheet Barrier - Made in the USA!" Discount review update price today
Subscribe to:
Comments (Atom)